How to Install our Sections
- Select: Edit code
- While logged in Shopify Admin:
- Click on "Online Store"
- Click the 3-dots next to "Customize", and
- Select "Edit code" - Select: Add a new section
- On the left-side panel, scroll down to "Sections"
- Click on "Add a new section"
- Assign a name for this section, whatever you like. - Paste the code and Save!
- Select all the code generated by Shopify, and delete it.
- And paste the code you received after making a purchase from our store
- Save the code and exit - Start Customizing your store
- Click on Customize
- Find the page you want to add this section
- Add the section and customize it.
→ All of our sections begin with "PS" in the name, they should be located at the bottom of the list of sections.
⭐ Step-By-Step Image-guide
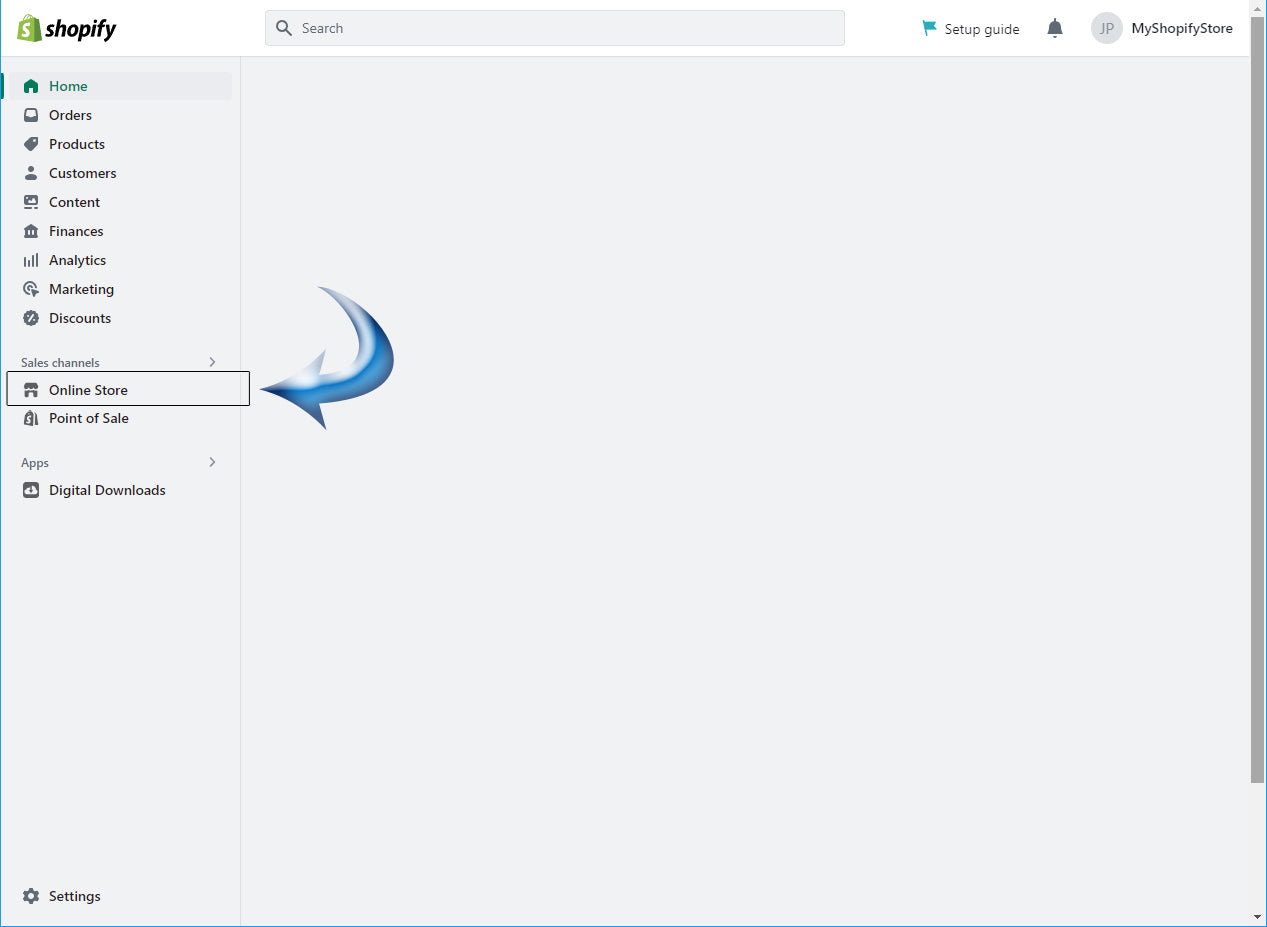
1) Online Store
On the left-side panel, select
"Online Store"
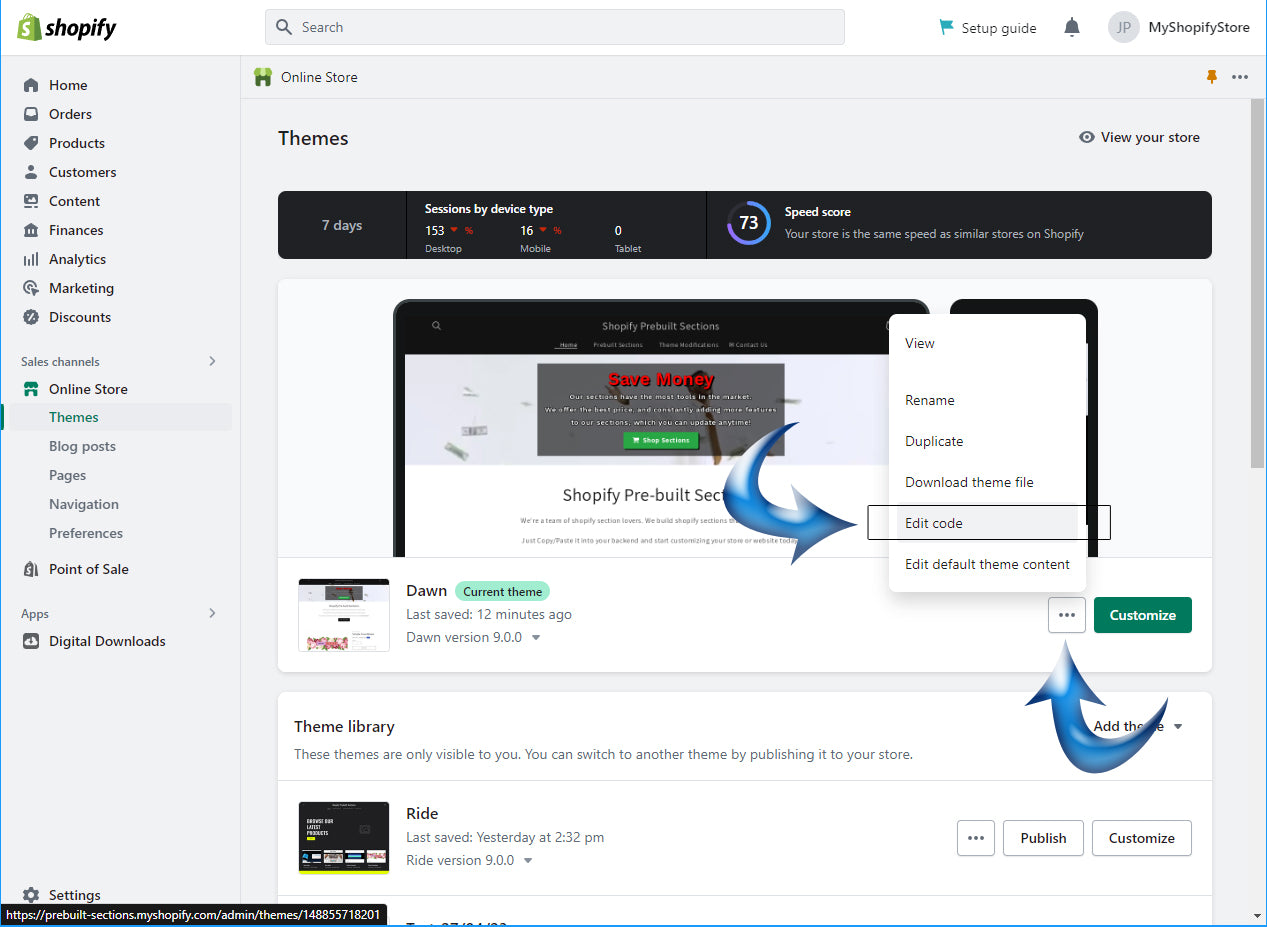
2) Edit Code
Click the 3-dots next to "Customize" and
Select: "Edit Code"
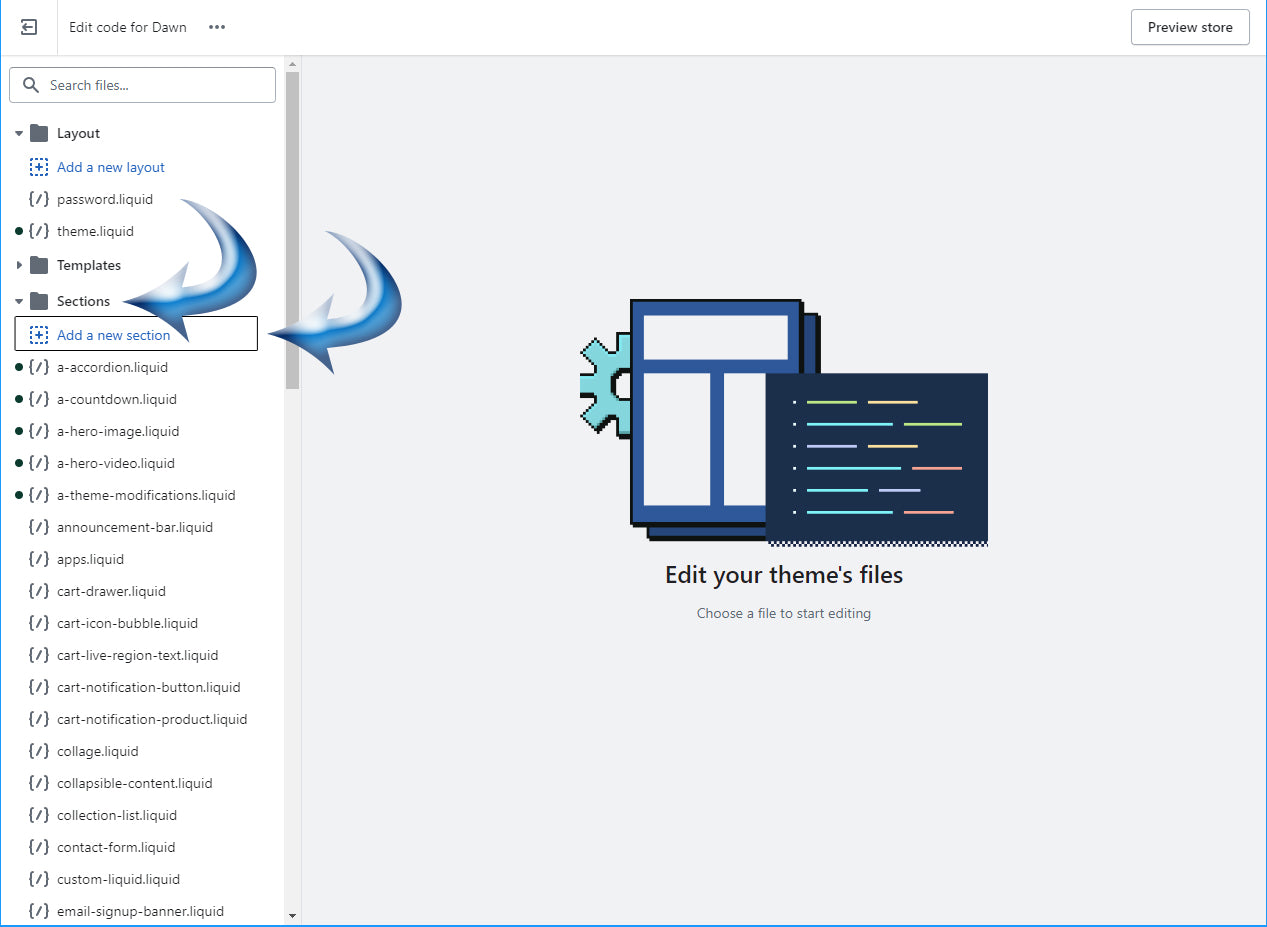
3) Add a New Section
On the left-side panel, scroll down to "Sections" and
Click on "Add a new section"
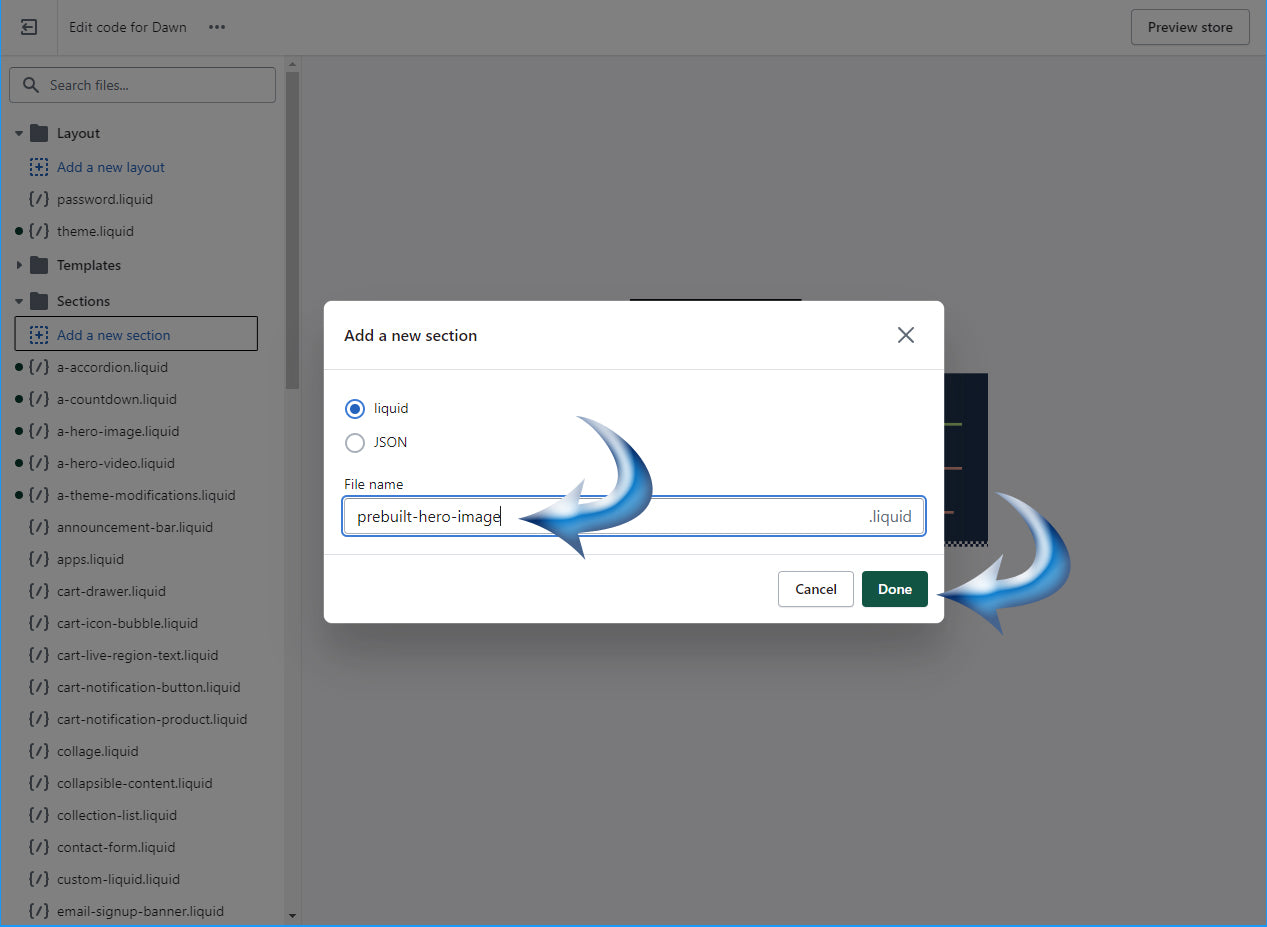
4) Add a name
Give it any name, preferable one that can be easy to find*
* for future updates (requests)
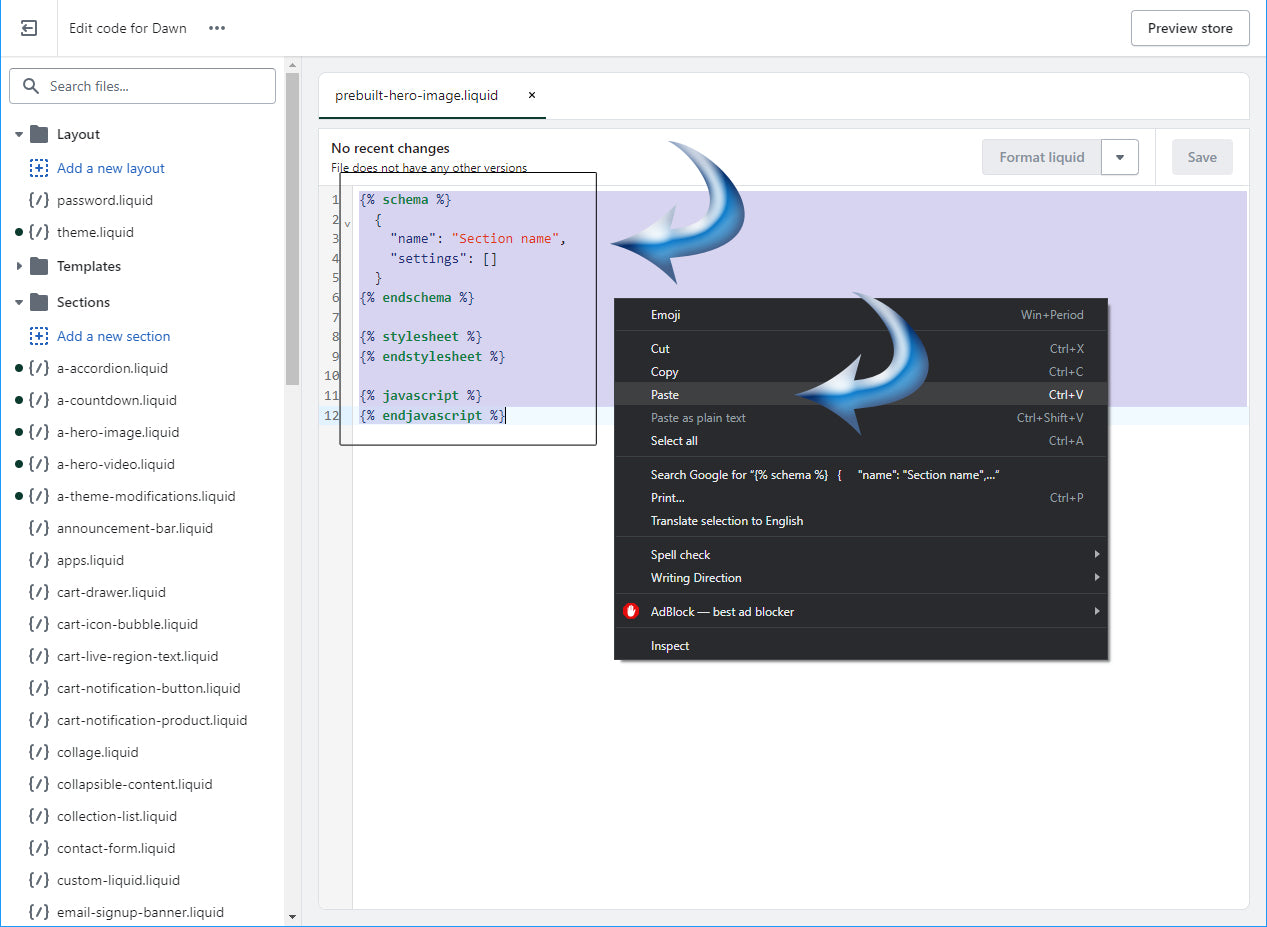
5) Copy/Paste the code
Copy our code from the file you received.
Select all the code generated by Shopify.
Right-Click and select "Paste"
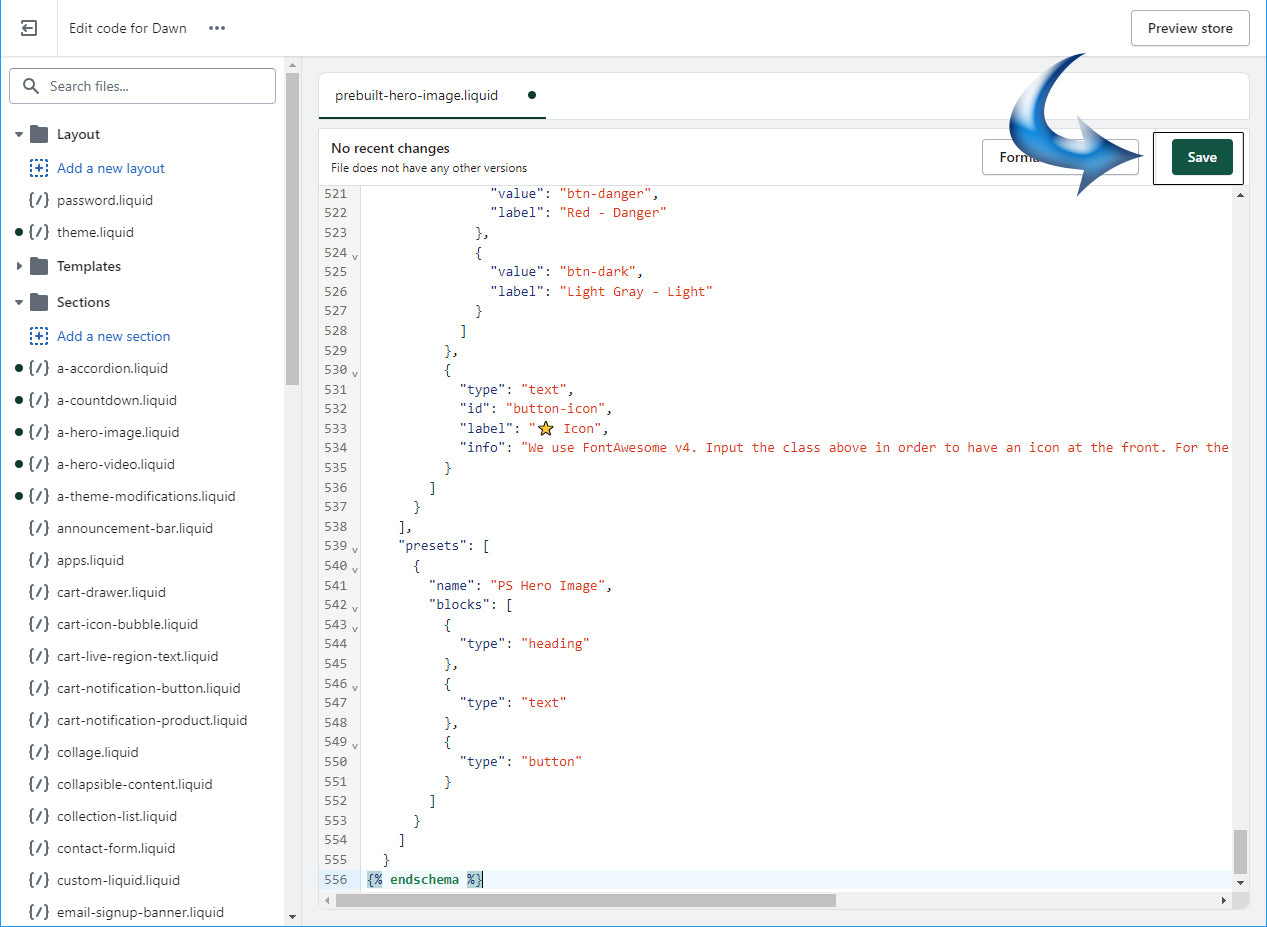
6) Save the code
Save the code, and at the top-left of the window
Click on "Exit", in order to return to the Store Admin
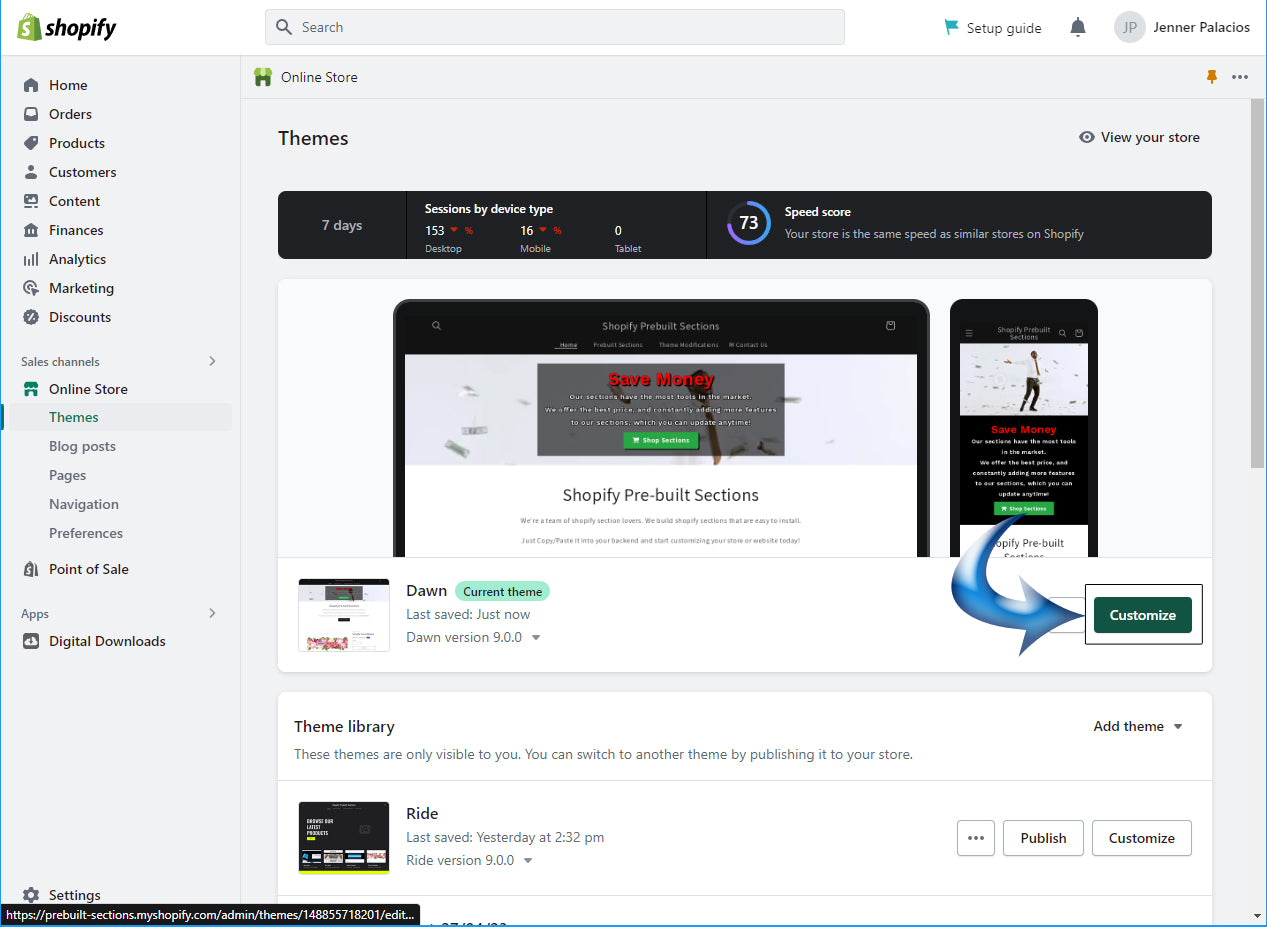
7) Customize the Store
On Shopify Admin, click on "Customize"
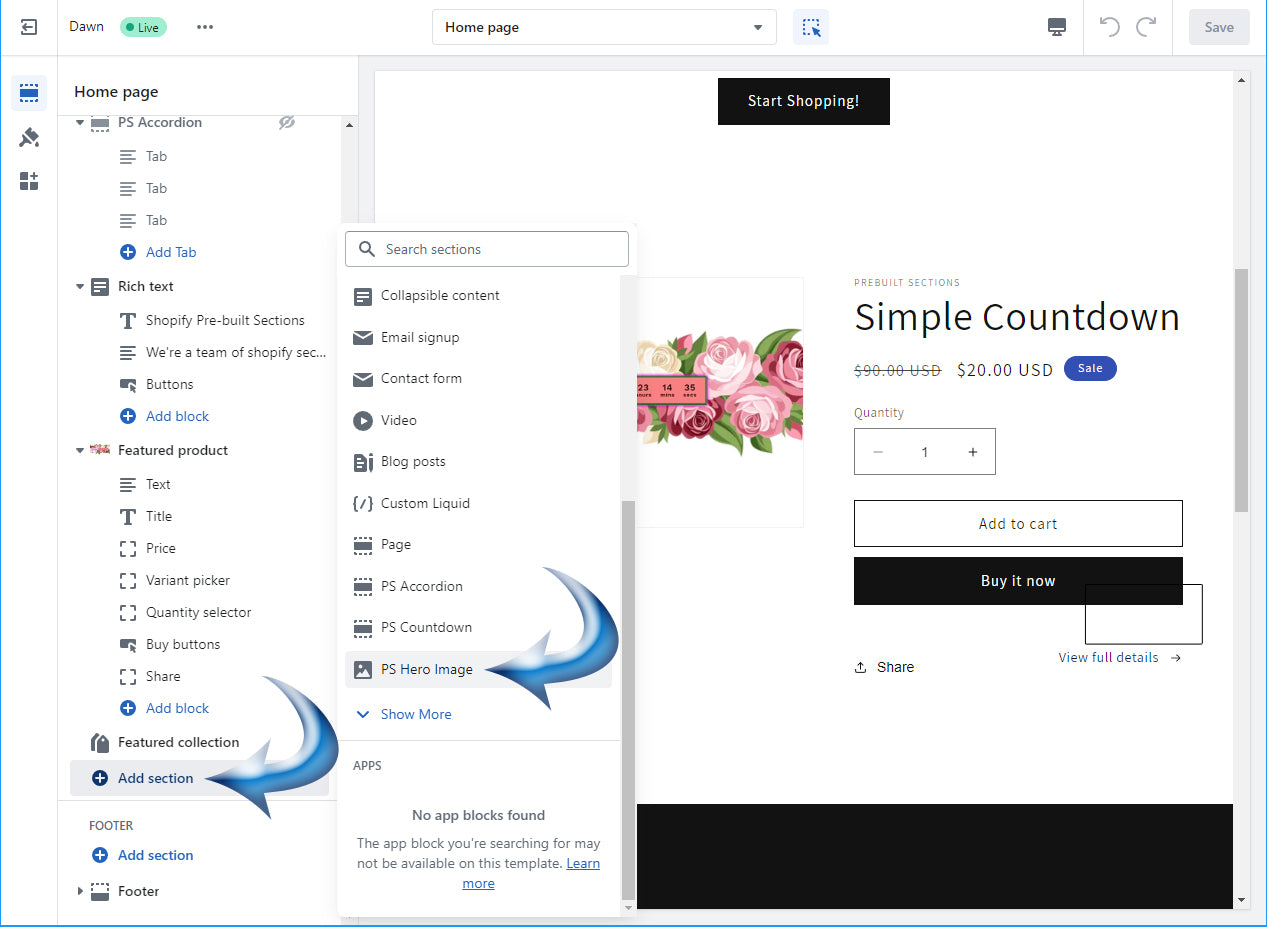
8) Add the Section
Find the page you want to add this section to.
Then, on left-side you will see the list of sections of the page you selected.
Scroll down to the bottom of the list and click on "Add Section".
On the list of sections, scroll down and click "Show More" and find section you purchased.
Begin customizing the section, and you're done!
